Sunday, June 12, 2016

My Red Velvet Nightmare

Most of my custom orders start out like this:  I am working my designated day at Stone House Antiques, behind the counter minding my own business and chatting up customers, when the manager points me out and says "SHE DOES CUSTOM WORK.".

Who me? Because I am super busy just keeping my rooms filled up with vintage goodness at Stone House Antiques and the People's Store.  I really don't need to take on custom work.  But my manager, JP, knows best.  There are some very dark, very cold days in February when few venture into the shops, sales are slow, and there is copious time for doing custom work. So I take on a few such projects every year.

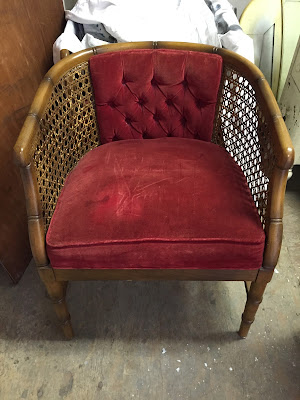
Of course, it helps if you have the perfect customer, like this one, who told me right away that she was in absolutely no hurry for the project and to please just call her when it was done. So I did.  Little did I know that this project would become my Red Velvet Nightmare. Here's what I started with:


TWO of these, actually.  My customer picked them up at the local flea market and brought them straight to me and this is when I made my First Mistake: always have your technique determined before you quote. You see, I planned to remove the seats and backs and spray these pieces to speed up the project.  Little did I know that the backs were stapled to the frame with 10,000 staples and impossible to remove. I would need to mask off the back cushions, front and back.


Which leads to Mistake Number Two:  Always have your up charge chart available and charge for extras. Don't blink.  If it takes more time to finish, ask for more money. Because after some discussion, my customer decided to leave the cane work natural and not paint it. So now I would need to mask off both the back and the cane work. And that becomes ridiculous, because I am masking more than I am painting, and I decided to paint the frame by hand.  And getting into all of those little cracks and crevices required a teeny tiny paintbrush and a boat load of patience.


And three coats of Annie Sloan Old White chalk paint, with sanding in between, thank you very much.  And let's not even talk about the glazing I did at not charge to match another piece. And the poly sealing.


Which brings me to Mistake Number 3:  I did not carefully examine the condition of the piece prior to quoting. Because the cane work was a hot mess.  It was broken and there was a lot of varnish chipping off.  After I got home with the chairs I noted this, photographed it and sent the photos to the customer. I wanted her to know that this was a pre-existing condition. And, of course, I couldn't do the rest of the work and leave this alone.  I had to use acrylic paint to touch up the chipping, and finish with a satin poly. Because I just can't leave well enough alone. And of course I didn't charge for it.


Now the nightmare really began with Mistake Number 4.  I had limited experience with fabric paint and had never painted on red velvet. And the first coat looked like this.. yeah, like it never even happened.  It took countless coats of Annie Sloan mixed with textile medium to get the fabric covered. I lost track of the hours at this point and brought the chairs back home from the studio to my basement where I could finish the textile painting in perfect solitude while watching whatever was on HGTV.  Those are quite a few hours I will never get back.


The good news is that I did charge for the custom color that I applied to the buttons and trim.  And I am so glad that she asked for that, it adds so much character to these chairs.


Would I do it again? In a heartbeat.  I learned more from this project that I ever expected, both in terms of my technique and my business.  And next time, I'll charge double :).


 photo signature_zps19d987c8.png

Friday, September 25, 2015

Still at it... and getting back to the blog

I cannot believe that it has been so long since my last blog post. Although I have been working very hard at the Stone Cottage Workshop, and posting on Facebook intermittently, my blogging just fell off the edge of the planet. Why? Well, I've opened two new shops... and a new workshop studio!

The Stone House Antique Center is still my number one place to sell my vintage goodness - classic fine linens, lace, painted furniture, silver.... I come in every Tuesday to open the store and greet customers, along with pricing and placing new merchandise, and work there other days of the week when they need me. But I found that some of the things I love, like the funkier linens, housewares and furniture from the 50's, 60's and 70's didn't sell well at Stone House. I think this is primarily because most of our clientele at Stone House are local residents from the Bucks County area, many of whom live in the wonderful old stone houses that grace the region. So I went looking for site #2 to host the midcentury stuff.
 
Enter "Stone Bungalow" at The People's Store, Lambertville, NJ! I just love my space on the second floor of the People's Store. I've now been here now since February, 2015.  It's really a very small space, only about 8' across by 15' long, so I've had to really work hard at utilizing every inch for display.


Although it's small, the good news is that Lambertville is a very happenin' place, with festivals and special events most weekends. It's right on the Delaware, and is considered one of the prettiest towns in New Jersey. Great restaurants and fantastic coffee and ice cream here too! So now that I have that place up and running, what's left to do but... open space three!
 
 
This is "Stone Bungalow" #2- at New Hope Antiques Center.  This is a new store that just opened up over the summer. It is located on Route 202 outside of New Hope just across from the New Hope Winery. This spot gave me an opportunity to continue to riff on the linens I love, painted furniture, and whatever else catches my fancy.
 

After opening this third shop, I now know that it's time to quit expanding and start sharpening my retailing skills. It's proven quite challenging to keep all three spaces stocked, fluffed and folded. But there is one last new space to talk about on my next blog post... it's where the Stone Cottage Workshop is creating a new studio space. This may be my favorite space of all.


 photo signature_zps19d987c8.png

Monday, January 12, 2015

Treat your Window to Vintage Linens

As a linen dealer, I come across fabulous handkerchiefs, runners, and other small pieces which don't make the grade due to a minor imperfection. It is always such a bummer to find something with great color or lace that has not been treated with the respect it is due.

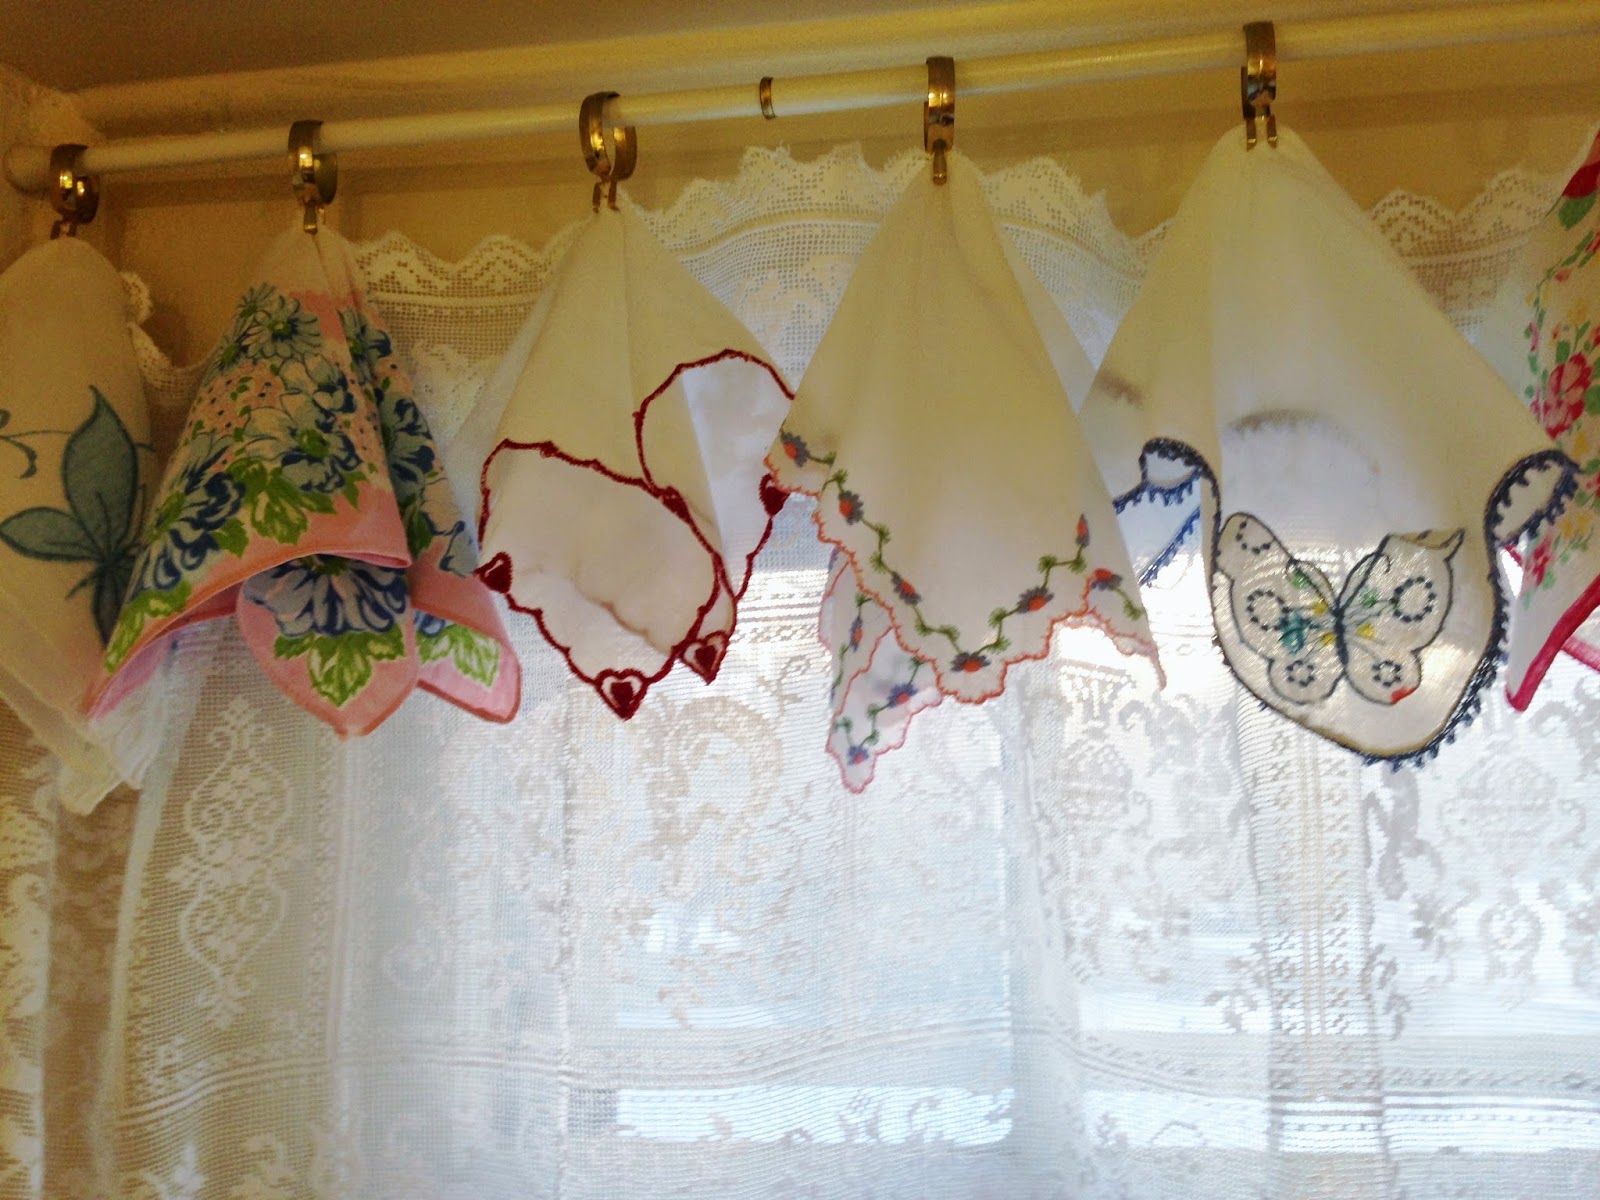
One great way to make use of less than perfect linens is to repurpose them as window treatments. When they are up on the window, your eye will focus on the overall effect and you will never see a minor imperfection.
This is a fast and easy project. I use spring tension rods and cafĂ© clips - if you are like me you will find these at sales and flea markets. Here I clipped an Italian lace runner and vintage handkerchiefs to the clips - literally ten minutes from beginning to end. 


For Christmas, I replaced the vintage hankies with a combination of Christmas handkerchiefs and one-off Christmas napkins. 
This also works quite well to create a casual and colorful valance for neutral curtains. At the shop, I used vintage napkins to create valances over these wonderful lacy sheers.  
These sheers are available for sale in my shop - I believe that I have a total of 8 individual curtains. I plan to offer a special bin with imperfects and singles at the Stone Cottage so that you can create this look quickly and easily, if you don't already have a stash on hand!
 
I have been known to share my blog with the following wonderful bloggers:

Sunday:

Monday:
Tuesday:
Wednesday:
Thursday:
Friday:
Saturday:


 photo signature_zps19d987c8.png

Monday, December 15, 2014

Creating herbal sachets from vintage handkerchiefs - a great little gift!

As I make my way through the cluttered rooms at estate sales, I always look carefully for vintage handkerchiefs. It may come as a surprise to the "Kleenex Generation", but there was a time, not so long ago, when a lady would never be caught without her gloves, hat, stockings, and a clutch purse containing 'mad money' and a sweet little hankie.
 
 
I can't resist the beauty, color, fabric and handwork in a gorgeous vintage handkerchief. Fortunately, my customers like them also, and I generally find buyers for the many Madeira, Swiss, US and Japanese printed hankies that I come across. Ironing and packaging theses vintage beauties is so much fun for me.

These beauties tend to be fragile, however, and I sometimes find upon close examination a small flaw - a pinhole, ink spot, or unraveling hem. What to do with these? Repurpose them, of course!

One good use is to make a herbal sachet - these smell so great in a clothing dresser drawer, a stored evening purse, even in your car. I made these with lavender buds, but you could also do this with any aromatic herb, cedar clippings, rose petals... And they are easy to make, as you will see.....
 
First, lay out your vintage handkerchief flat on a tabletop and top it with one ply of a facial tissue. This will be thin, but strong enough to contain the herbs without a problem.

Next, place a few drops of aromatic oil on a cotton ball or something similar and place on top of the tissue. I used these cosmetic puffs, which are circular and work well in the puffy shape of the sachet. I used this organic lavender oil for my sachets - and this small bottle will be enough to make at least a thousand of them.
 
Next, add two to three tablespoons of the herb you have chosen. I spooned these lavender buds into the center of the handkerchief on top of the cosmetic puff.


Finally, tie the hankie up with ribbon (odds and ends work well for this) or lace and you are done!

And the best part of this is - you can open the sachet back up and replenish the aromatic oil when it starts to wear out. Or take the whole thing apart if you chose, and the handkerchief can be used for another purpose - like these sweet window treatments.


I made a few dozen of these sachets for a promotion at Stone House, and offered one free to each customer who purchased my linens. The top row was made with vintage tea napkins that were imperfect; the bottom layer was made with vintage handkerchiefs. They were gone in a matter of days, but in the mean time, the shop smelled GREAT.


 photo signature_zps19d987c8.png

Saturday, November 15, 2014

Back Home from the Paris Markets!

Last week I received a special treat. Husband Michael had been working in France and Holland and I flew over to meet him in Paris for a long weekend. We stayed at a wonderful small hotel in the Rue Cler area. I could tell you the name of the hotel, but then I'd have to kill you - it's that special.  Needless to say, hopefully I'll be back.
On our first day, I was pretty jet lagged from the overnight flight, and we hung out within a few blocks of our hotel.
Of course, those few blocks included some amazing places.
Michael and I spent most of the following day at Montmartre, walking the hill (or, actually, a butte, according to geologists). It was amazingly uncrowded and we quickly ditched the few tourists that we found there, seeking out the homes and studios of artists including Picasso, Van Gogh, Modigliani, Erik Satie, and others. Prior to the Moulin Rouge and Pigalle, one of our first stops was the Basilica Sacre-Coeur. Here is a part of the view from the front steps:
Montmartre was wonderful.  But some of our best times on this trip (besides toasting Jim Morrison at his grave site - another story for perhaps another blog) were at the Paris flea markets - the marche au puces. We started at the biggest flea market - the Marche aux Puces de Saint-Ouen - best known as Clignancourt (pronounced “Clee-nyahn-cour”). We like to use the metro in Paris and it was a long way to the 18th arrondissement from Rue Cler with two train changes. Along the way we discovered that Clignancourt station was closed and we had to transfer to a bus the final mile or so.... which took up valuable time and even more on the way back. Here is my partner in crime, who valiantly trained, bussed, and walked miles with me that day:
 Here I am striking a pose after scoring some great vintage textiles at Clignancourt.

The following day, because too much is never enough, we followed up with a visit to the market at Port de Vanves.

This market was not only closer but also a fraction of the size of Clignancourt - perhaps a good thing. Overall, it was much more manageable and the vendors seemed more friendly and ready to deal. I was able to find a number of beautiful French linen sheets, in addition to more tea towels. 
Once again, Michael valiantly walked the aisles at Vanves and held my bags. He was looking hard for an antique lever corkscrew but wasn't able to find exactly what he was looking for.


Now back in the States with my finds, some of these linens will find their way into the shop at Stone House Antiques within the next week or so. These red and green towels will look wonderful for the holidays. I can't wait to share them with you!


 photo signature_zps19d987c8.png

Tuesday, September 23, 2014

Dear Damask.....

Yes, damask is dear to the heart of all antique textile collectors and dealers. It is the backbone textile most frequently used in household linens, such as tablecloths, napkins, towels, and bedcovers.


Fairchild's "Dictionary of Textiles" describe damask as:
       ....a broad range of jacquard-woven fabrics with elaborate floral or geometric patterns, made of linen, cotton, wool, worsted, silk, rayon, acetate, and other manufactured fibers.  The pattern is distinguished from the ground by contrasting luster and is reversible....

     ...Single damask is made with a five-harness satin weave; the true (double) damask is woven with an eight harness satin weave and has a firm hand.
Early 20th Century double damask pattern of stylized poppies


As a gardener, I find the floral damask patterns to be the most lovely. Undoubtedly the most popular are the rose patterns.


Close behind are tablecloths destined for fall with chrysanthemums.

Here are some napkins I have on hand with a pattern of iris.

There is no doubt that this napkin is of Irish linen, with a Irish wolfhound, clovers, and other Irish symbols woven into the damask.
 The shop recently hosted a double damask set of large napkins with images of wild game. Each napkin was centered by a large stag, with quail, partridge, and rabbits woven into the pattern, but they were purchased before I could get a photo taken.

Laurel wreaths are often woven into damask towels, and the wreaths are often embroidered with the owner's monogram.  Although this damask towel is white, I have also have Victorian era green and turkey red damask at the Stone Cottage Workshop.

With the advent of rayon in the 1920's, rayon damask became quite popular by mid century due to its shimmer, ability to take dye, and ease of ironing. I often find rayon damask with original labels from Belgium, Czechoslovakia, and Japan. This tablecloth and 12 napkin set currently at the shop has a wonderful golden glimmer and would look beautiful under candle light at Thanksgiving.

This set has a subtle floral damask pattern behind the border plaid - perfect for fall dinners.

Emily Post hawked linen damask in the 1920's ....


Martha Stewart currently uses damask in products for every part of the home....

Damask has been with us for a thousand years. And hopefully a thousand more.


 photo signature_zps19d987c8.png